
The Real Scope of a Kitchen Remodel: Phases, Trade Sequencing, and Timelines
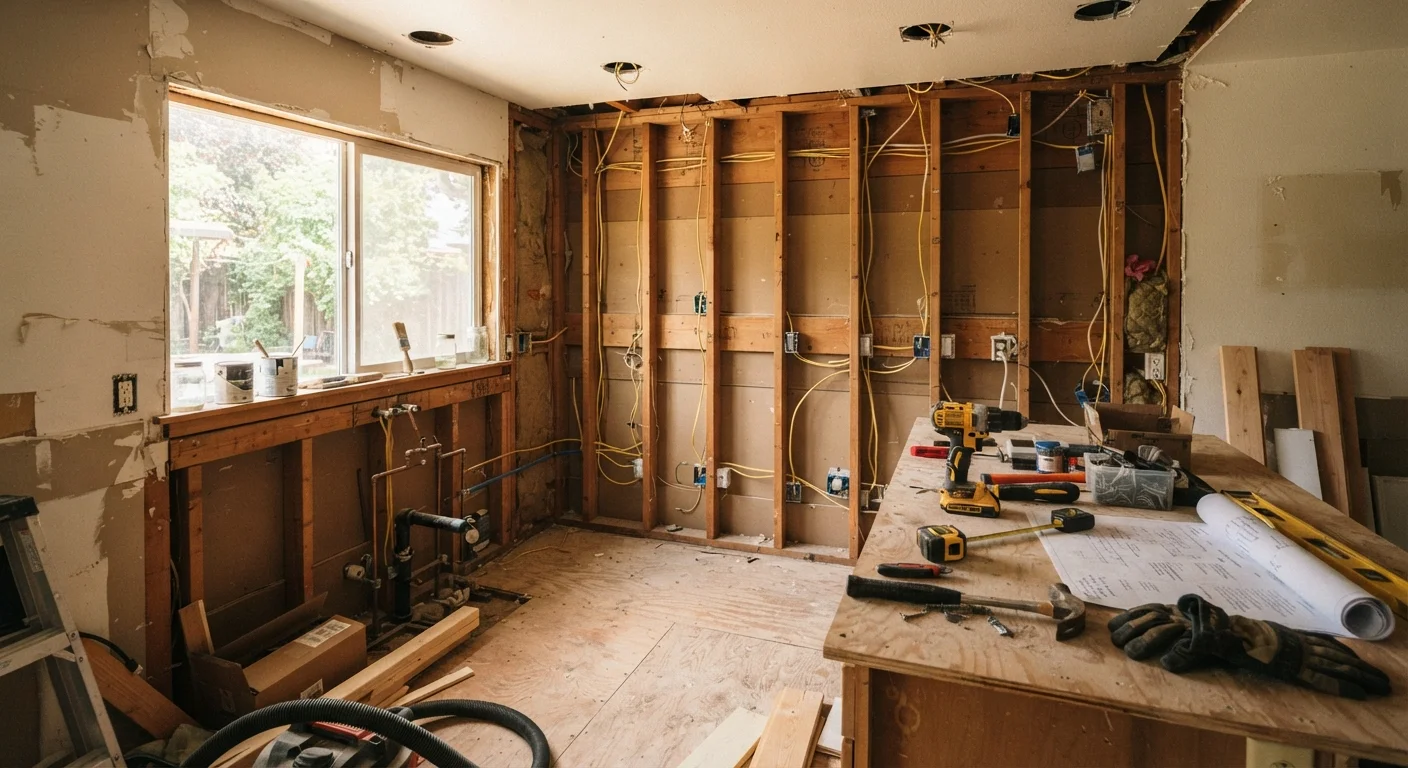
Photo credit: PrimeFaqs.com | Trending And Accurate Content
In this article
- Why Trade Sequencing Makes or Breaks a Kitchen Remodel
- Phase 1: Planning, Design, and Permits
- Phase 2: Demolition
- Phase 3: Rough-In Work - Framing, Electrical, Plumbing, and HVAC
- Phase 4: Inspections, Insulation, and Drywall
- Phase 5: Cabinets, Flooring, and Countertops
- Phase 6: Finish Work and Final Inspection
- Realistic Timeline Expectations
A kitchen renovation involves multiple trades working in a specific order. This end-to-end overview explains every phase from demolition to final inspection.
Key Takeaways
- Kitchen remodels follow a strict trade sequence - skipping steps creates costly rework.
- Permits are typically required for electrical, plumbing, and structural changes in a kitchen.
- Rough-in inspections must pass before walls are closed with insulation and drywall.
- Cabinet installation establishes the layout reference point for countertops and appliances.
- Most full kitchen remodels take six to twelve weeks from demolition to final walkthrough.
- Change orders mid-project are the leading cause of budget overruns and schedule delays.
Why Trade Sequencing Makes or Breaks a Kitchen Remodel
A kitchen renovation is not a single project - it is a coordinated series of interdependent tasks carried out by multiple licensed trades. Electricians, plumbers, HVAC technicians, tile setters, cabinet installers, and finish carpenters each need the work ahead of them completed before they can do their job. When that order breaks down, contractors are forced back for rework, materials arrive before the space is ready, and timelines stretch painfully.
Understanding how the phases connect gives homeowners the ability to ask informed questions, catch scheduling conflicts early, and hold contractors accountable without micromanaging. Whether you are hiring a general contractor to manage the full project or acting as your own project manager, knowing what comes next - and why - is the single most useful thing you can bring to the job site.
For projects that involve removing interior walls to open up the kitchen, the stakes are even higher. See our guide to structural realities in open-concept remodels before any demolition begins.
Phase 1: Planning, Design, and Permits
No trade should touch a kitchen until the design is fully resolved and the permit application is submitted - ideally approved. Decisions made on paper are far cheaper than decisions made during demolition. This phase covers layout finalization, appliance selection, cabinet lead times (which can run eight to twelve weeks for semi-custom or custom orders), and material sourcing.
Most kitchen remodels that involve moving plumbing, adding circuits, or altering the structure require one or more permits. Requirements vary by municipality, so verify with your local building department before assuming a task is permit-free. Our companion article on interior renovation permits explains which work categories typically trigger permit obligations and how to confirm local rules.
Order Early to Avoid the Biggest Delay
Order cabinets and any long-lead-time appliances during the permit review period, not after approval. Lead times often exceed permit processing times, and aligning these windows prevents weeks of idle waiting once the job site is ready. Confirm delivery dates in writing with your supplier.
Order cabinets and any long-lead-time appliances during the permit review period, not after approval. Lead times often exceed permit processing times, and aligning these windows prevents weeks of idle waiting once the job site is ready.
Phase 2: Demolition
Demolition is the most visually dramatic phase and often the fastest - a full kitchen gut can take one to three days. It involves removing cabinets, countertops, flooring, appliances, and often drywall down to the studs. What demolition reveals matters as much as what it removes: hidden water damage, outdated wiring, galvanized pipes, or undersized electrical panels frequently surface here and must be addressed before rough-in work proceeds.
Hazardous material testing - for asbestos in older floor tiles or joint compound, and lead paint in pre-1978 homes - should be completed before demolition begins, not during. Disturbing these materials without proper abatement procedures can create health and legal liability. When in doubt, engage a certified inspector.
Test for Hazardous Materials Before Demolition
Homes built before 1980 may contain asbestos in floor tiles, popcorn ceilings, or joint compound, and lead paint on surfaces. Disturbing these materials without proper testing and abatement is a health and legal risk. Hire a certified inspector to test before any demolition work begins - do not rely on visual identification alone.
Phase 3: Rough-In Work - Framing, Electrical, Plumbing, and HVAC
Rough-in is the backbone of the remodel. All framing changes happen first, establishing new wall locations and any structural modifications. Once framing is complete, the three major mechanical trades work - sometimes overlapping, always coordinating.
- Electrical rough-in: New circuits, panel upgrades, outlet locations, lighting rough-in, and under-cabinet power are run through open walls. Kitchens typically require dedicated circuits for the refrigerator, dishwasher, microwave, and countertop receptacles under current code.
- Plumbing rough-in: Supply lines and drain lines are repositioned if the sink, dishwasher, or refrigerator ice maker is moving. Moving a drain even a few feet involves re-sloping the drain line, which can affect floor framing below.
- HVAC rough-in: Range hood ducting is run through the wall or ceiling to an exterior termination point. If the layout changes, existing duct runs may need to be rerouted.
Rough-in is also where the most significant decisions about daily functionality live. Changing outlet locations or adding a circuit is straightforward before drywall; after drywall, it is expensive and disruptive.
Mark your rough-in locations with photos before drywall goes up. Photograph every wall showing wire and pipe locations with a measuring tape in frame - this reference is invaluable for future repairs or renovations.
Locating hidden utilities years later is time-consuming and can result in accidental damage during drilling or fastening. A simple photo log costs nothing and prevents significant problems.
Confirm your cabinet delivery date at least two weeks before it is scheduled to arrive, and ensure the site is ready to receive them - drywall finished, primed, and the space clear of debris.
Cabinets stored improperly or delivered to an unprepared site can warp, be damaged, or block other trade work, cascading delays throughout the project.
Phase 4: Inspections, Insulation, and Drywall
Before any wall cavity is closed, rough-in inspections must be scheduled and passed. A building inspector will verify that electrical, plumbing, and framing work meets local code. Failing an inspection means corrections before the walls can close - skipping the inspection entirely can result in required teardown at a later date and complications when selling the home.
After inspections pass, insulation is installed in exterior walls and any thermally or acoustically relevant interior walls. Drywall installation follows, then taping, mudding, and sanding - a multi-day process with mandatory drying time between coats. Rushing drywall finishing is one of the most common sources of cracking and paint adhesion problems later.
Inspection Timing Varies by Jurisdiction
Some municipalities require separate inspections for framing, electrical rough-in, and plumbing rough-in, while others conduct a single combined rough-in inspection. Confirm the required inspection sequence with your local building department at permit issuance - your general contractor or permit expediter can also clarify this. Scheduling inspections proactively prevents idle days waiting for an available inspector.
Phase 5: Cabinets, Flooring, and Countertops
Cabinet installation is a reference point for everything that follows. Cabinets must be level and plumb - even minor deviations compound into visible gaps at countertops and appliances. Upper cabinets are typically installed before lowers to avoid working over them.
Flooring sequencing depends on the chosen material and cabinet strategy. Installing flooring before cabinets creates a continuous floor that simplifies future cabinet replacement, but it risks damage during installation and wastes material under permanent fixtures. Most tile installations go in after cabinets for this reason, while hardwood or LVP (luxury vinyl plank) is often installed before. Discuss the trade-offs with your installer before committing.
Countertop templating - the precise measurement used to cut stone slabs - happens after cabinets are fully set. Stone fabrication typically takes one to two weeks from template to installation. This is a common scheduling bottleneck in kitchen projects.
If you are weighing which parts of this phase are reasonable DIY candidates, our article on DIY vs. professional installation trade-offs breaks down skill requirements and permit considerations by task type.
Phase 6: Finish Work and Final Inspection
Finish work encompasses everything that makes the kitchen feel complete: painting, trim installation, backsplash tile, plumbing fixture trim-out (faucets, garbage disposal, dishwasher connection), electrical device installation (outlets, switches, lighting fixtures), and appliance setting. This phase involves the most coordination and the most potential for minor rework - a tile cut that needs to be adjusted for an outlet box, or a range hood that needs shimming to align with cabinetry.
A final inspection is typically required for permitted work and covers installed devices, fixture connections, and code compliance of the finished product. Passing the final inspection closes out the permit and provides a documented record that work was completed to code - valuable documentation when refinancing or selling.
Punch-list walkthrough with your contractor should happen after final inspection, not before. Note every incomplete or unsatisfactory item in writing and establish clear completion deadlines before releasing final payment.
Realistic Timeline Expectations
A full kitchen gut-and-remodel in an average American home - where plumbing, electrical, and layout are all changing - typically runs six to twelve weeks of active construction. That range widens with custom cabinets, structural changes, or material backorders. Partial remodels (cabinet refacing, countertop replacement only) can complete in one to two weeks.
6-12 weeks
Typical full kitchen remodel duration
Industry estimates from the National Kitchen and Bath Association (NKBA) for a full gut renovation with trade work.
8-12 weeks
Average lead time for custom cabinets
Semi-custom and fully custom cabinet orders frequently require two to three months from order to delivery, per manufacturer estimates.
10-15%
Recommended contingency budget
Professional remodeling contractors commonly advise reserving this percentage above the quoted cost to cover unforeseen conditions.
The most reliable way to compress the timeline is to make all design decisions before demolition begins and to front-load material procurement. Change orders - modifications requested after work has started - are the single most common cause of schedule extension and budget overrun. Each trade may need to return, re-quote, and reschedule, adding days or weeks and administrative overhead throughout the project.
Build a realistic contingency of 10-15% of total budget and two to three weeks of schedule buffer into your planning from the start. Kitchens, more than almost any other room, reveal unexpected conditions during demolition that require adaptation.

Author
Home & Garden Editorial Team
Home & Garden Editorial Team is the collective byline for our editorial team and contributor network. Articles published under this byline or an editorial pen name are researched, written, and reviewed according to our editorial standards for clarity, consistency, and independence before publication.
View all articles →